
Interior.
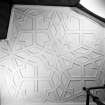
Digital image of quarter plan view of ceiling, SE compartment (Blue Room), fourth floor.
View in Canmore
View in Canmore

Interior, first floor, main hall, detail of plaster panel above fireplace.
View in Canmore
View in Canmore

False spout no. 386, view of end (daylight)
View in Canmore
View in Canmore

False spout no. 385, view of end (daylight)
View in Canmore
View in Canmore

Grotesque head no. 407 (flash)
View in Canmore
View in Canmore

False spout no. 377, view of right side (flash)
View in Canmore
View in Canmore

False spout no. 385, view of underside (flash)
View in Canmore
View in Canmore

Carved lion from coat of arms (flash)
View in Canmore
View in Canmore

False spout no. 366
View in Canmore
View in Canmore

False spout no. 366, view of left side (flash)
View in Canmore
View in Canmore

False spout no. 366, view of right side (flash)
View in Canmore
View in Canmore

False spout no. 366, view of top (flash)
View in Canmore
View in Canmore

False spout no. 368, view of right side (daylight)
View in Canmore
View in Canmore

False spout no. 380 (flash)
View in Canmore
View in Canmore

False spout no. 381, view of end (flash)
View in Canmore
View in Canmore

False spout no. 381, view of right side (flash)
View in Canmore
View in Canmore

False spout no. 380 (daylight)
View in Canmore
View in Canmore

False spout no. 353, view of end (daylight)
View in Canmore
View in Canmore

False spout no. 381, view of underside (flash)
View in Canmore
View in Canmore

False spout no. 375, view of left side (flash)
View in Canmore
View in Canmore

False spout no. 365, view of right side (flash)
View in Canmore
View in Canmore

False spout no. 360, view of underside (flash)
View in Canmore
View in Canmore

False spout no. 355, view of left side (daylight)
View in Canmore
View in Canmore

False spout no. 360, view of end (flash)
View in Canmore
View in Canmore

Gargoyle spout no. 394, view of underside (daylight)
View in Canmore
View in Canmore

Finial no. 685, general view from S
View in Canmore
View in Canmore

Finial no. 685, view from N (daylight)
View in Canmore
View in Canmore

Scanned pencil survey drawing of Grotesque Head no. 400
View in Canmore
View in Canmore

Scanned pencil survey drawing of Grotesque Head no. 402
View in Canmore
View in Canmore

Scanned pencil survey drawing of uncarved panel no. 410
View in Canmore
View in Canmore

Scanned pencil survey drawing of False Spout no. 381
View in Canmore
View in Canmore

Scanned pencil survey drawing of Gargoyle Spout no. 394
View in Canmore
View in Canmore

View of pediment (W51) on S elevation (flash)
View in Canmore
View in Canmore

Detail of finial on left side of pediment (W51) on S elevation
View in Canmore
View in Canmore

Detail of detached finial
View in Canmore
View in Canmore

New carved false spout with bear and bear berries (daylight)
View in Canmore
View in Canmore

New carved false spout with saltire (flash)
View in Canmore
View in Canmore

New carved false spout with saltire, upper face (daylight)
View in Canmore
View in Canmore

New carved false spout with Sempill sword (daylight)
View in Canmore
View in Canmore

New carved false spout with rowan sprig, upper face (daylight)
View in Canmore
View in Canmore

New carved false spout with running stag (daylight)
View in Canmore
View in Canmore

New carved false spout with running stag, upper face (daylight)
View in Canmore
View in Canmore

New carved false spout with brooch (daylight)
View in Canmore
View in Canmore

New carved false spout with hunting horn (flash)
View in Canmore
View in Canmore

Mason carving false spout (oak leaves)
View in Canmore
View in Canmore

View on scaffold showing new false spouts prior to fitting
View in Canmore
View in Canmore

Mason spreading mortar on wall prior to fitting new false spout
View in Canmore
View in Canmore

Angus Lamb (RCAHMS photographer) with video camera on scaffolding
View in Canmore
View in Canmore

Mason preparing new false spout prior to fitting
View in Canmore
View in Canmore

Angus Lamb (RCAHMS photographer) videoing masons drilling false spout
View in Canmore
View in Canmore

View of turrets from scaffold at roof level
View in Canmore
View in Canmore

View of turret from scaffold at roof level
View in Canmore
View in Canmore

Detail of weather vane
View in Canmore
View in Canmore

Detail of weather vane
View in Canmore
View in Canmore

Mason preparing wall to take new false spout
View in Canmore
View in Canmore

Mason applying mortar to castle prior to fitting new false spout
View in Canmore
View in Canmore

View of turrets.
View in Canmore
View in Canmore

Interior. 2nd. floor, Jameson bedroom, detail of frieze
View in Canmore
View in Canmore

Interior. 1st. floor, main hall, detail of plaster boss above east window
View in Canmore
View in Canmore

Interior. 1st. floor, main hall, detail of inscription on underside of lintel above east window
View in Canmore
View in Canmore

Interior. Ground floor, half-landing, detail of plaster panel showing coat of arms
View in Canmore
View in Canmore

Interior. 2nd. floor, Jameson bedroom, plan view of south east corner section of ceiling
View in Canmore
View in Canmore

Interior. 2nd. floor, Jameson bedroom, detail of plaster corbel
View in Canmore
View in Canmore

Interior. 3rd. floor, stair, detail of plaster panel with coat of arms
View in Canmore
View in Canmore

Interior. 4th. floor, Blue room, south east turret, plan view of ceiling
View in Canmore
View in Canmore

Interior. 4th. floor, Dressing room, plan view of ceiling
View in Canmore
View in Canmore

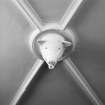
Interior. 4th. floor, landing, detail of central ceiling boss
View in Canmore
View in Canmore

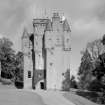
View of Craigievar Castle from S.
View in Canmore
View in Canmore

Interior view of Craigievar Castle showing fireplace in hall.
View in Canmore
View in Canmore

Interior view of Craigievar Castle showing detail of hall ceiling.
View in Canmore
View in Canmore

Interior view of Craigievar Castle showing detail of hall ceiling.
View in Canmore
View in Canmore

Interior view of Craigievar Castle showing detail of plaster plaque in the White Room.
View in Canmore
View in Canmore

View of turrets from SW, Craigievar Castle.
View in Canmore
View in Canmore

Interior view of Craigievar Castle showing detail of hall ceiling.
View in Canmore
View in Canmore

Interior view of Craigievar Castle showing detail of plasterwork in Blue Room.
View in Canmore
View in Canmore

Interior view of Craigievar Castle showing detail of Blue Room ceiling.
View in Canmore
View in Canmore

Interior view of Craigievar Castle showing box bed, now a bath, on landing to Queen's room.
View in Canmore
View in Canmore

Interior view of Craigievar Castle showing central ceiling boss in landing to Blue Room.
View in Canmore
View in Canmore

Interior view of Craigievar Castle showing stair and dungeons from entrance door.
View in Canmore
View in Canmore

Interior view of Craigievar Castle showing entrance door to dungeon from lobby.
View in Canmore
View in Canmore

Interior view of Craigievar Castle showing White Room.
View in Canmore
View in Canmore

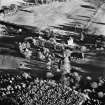
Oblique aerial view.
View in Canmore
View in Canmore

Aerial view.
View in Canmore
View in Canmore

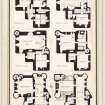
Floor plans showing dates of construction.
View in Canmore
View in Canmore

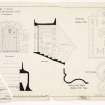
Details of old entrance door to courtyard.
View in Canmore
View in Canmore

Interior.
View of NW compartment from SE, fourth floor.
View in Canmore
View in Canmore

Interior.
View of doorway in NW compartment, ground floor.
View in Canmore
View in Canmore

Interior.
Detail of corbelling on newel of main turnpike, platt stair landing, principal floor.
View in Canmore
View in Canmore

Interior.
View of platt stair, principal floor.
View in Canmore
View in Canmore

Interior.
Detail of carved panel set in embrassure sides of E window in hall.
View in Canmore
View in Canmore

Interior.
Detail of plaster heraldic panel above fireplace, SE compartment, 2nd floor.
View in Canmore
View in Canmore

Interior.
Detail of cast-iron hob-grate, NW compartment, third floor.
View in Canmore
View in Canmore

Interior.
Plan-view of plaster ceiling in SE compartment (Blue Room), fourth floor.
View in Canmore
View in Canmore

Interior.
View of NE compartment from SE, fourth floor.
View in Canmore
View in Canmore

Interior.
View of folding bed in closed position, SW re-entrant compartment (Butler's room), sixth floor.
View in Canmore
View in Canmore

Interior.
Detail of cross-lined door, butler's room, SW re-entrant compartment, fifth floor.
View in Canmore
View in Canmore

Interior. 1st. floor, main hall, plan view of section of ceiling
View in Canmore
View in Canmore

Interior. 1st. floor, main hall, detail of plaster panel above south west window
View in Canmore
View in Canmore

Interior. 1st. floor, main hall, detail of plaster angel above south window
View in Canmore
View in Canmore

Interior. 1st. floor, stairwell, detail of roundel showing coat of arms
View in Canmore
View in Canmore
















You may copy, display, store and make derivative works for personal use or use solely within an educational institution by staff and students, under these conditions: the ScotlandsPlaces website is attributed, there is no commercial use or sale, and no public distribution (for example, by hand, email, or web). Full licence details.
Details
Organisation: Historic Environment Scotland (HES)
Alternative name(s): Craigievar Castle Policies
Canmore ID: 17471
Site type: Tower House (17th Century)
County: Aberdeenshire
Parish: Leochel-cushnie
Council: Aberdeenshire


